Visualizzazione post con etichetta Nancy. Mostra tutti i post

domenica 31 marzo 2019

Project of the Month: Moon Child Mini Album Tutorial by Nancy Nickel - Creative Team

Hello, everyone!


It's Nancy here with a fun share for Mirtillamente Craft Shop!

I have a new mini album tutorial for you! I hope you will be inspired!


Materials Used:


Silver Metallic Cardstock - 12 x 12 - 1


Georgia Blues Papers

Georgia Blues Flowers


Gather the the supplies...


...as I have listed.


For the covers - cut all pieces 6" x 8":
2 from chipboard
2 from Silver metallic cardstock
2 from Moon Child paper
(as shown - or choose another)


From light and dark purple cardstock:
Make 4 Envelopes that measure 5 1/2" x 7 1/2"
I used my envelope punch board to do this.


Cut a thin slice off the envelopes, as shown in the photo. 
On the long side of the light purple envelopes.
On the short side of the dark purple envelopes.
Punch a tab in the center of each opening, as shown.

Now have fun putting your album together, as shown in the following photos.


For the front cover:
Adhere the decorative paper to the front of the chipboard,
and the silver cardstock to the inside cover.


I added a triangle pocket to the inside to hold a card.
The next page is a double sided paper, cut at 5 1/2 x 7 1/2.
Both sides were too pretty to cover up! 


On the right, I covered the envelope with paper, punching a matching tab opening.
I added a decorative band to hold several cards.
I inserted a tag into the pocket, and used a flower for a pull.


Decorative paper on the envelopes.


Decorative paper on the envelopes, with the tabs punched out.
Tags inserted in the envelopes, with flower pulls.


More pretty paper on the envelopes.
I added punched pockets along the bottom to hold cards.


The back of the last envelope.
I covered it with paper, and punched a tab.
Here you can see the envelope insert pulled out.


I added another decorative band to hold some more cards.
The page on the right is the final double sided paper.
I think it's my favorite!


The last page, and inside back cover.
More cards in the pocket. 
All have beautiful metallic silver foil!
For the back cover: Silver metallic cardstock adhered to the inside of the chipboard, with the decorative paper adhered to the other side of the chipboard.

Finally, bind by method of choice. 
I punched three holes, and added binding rings.
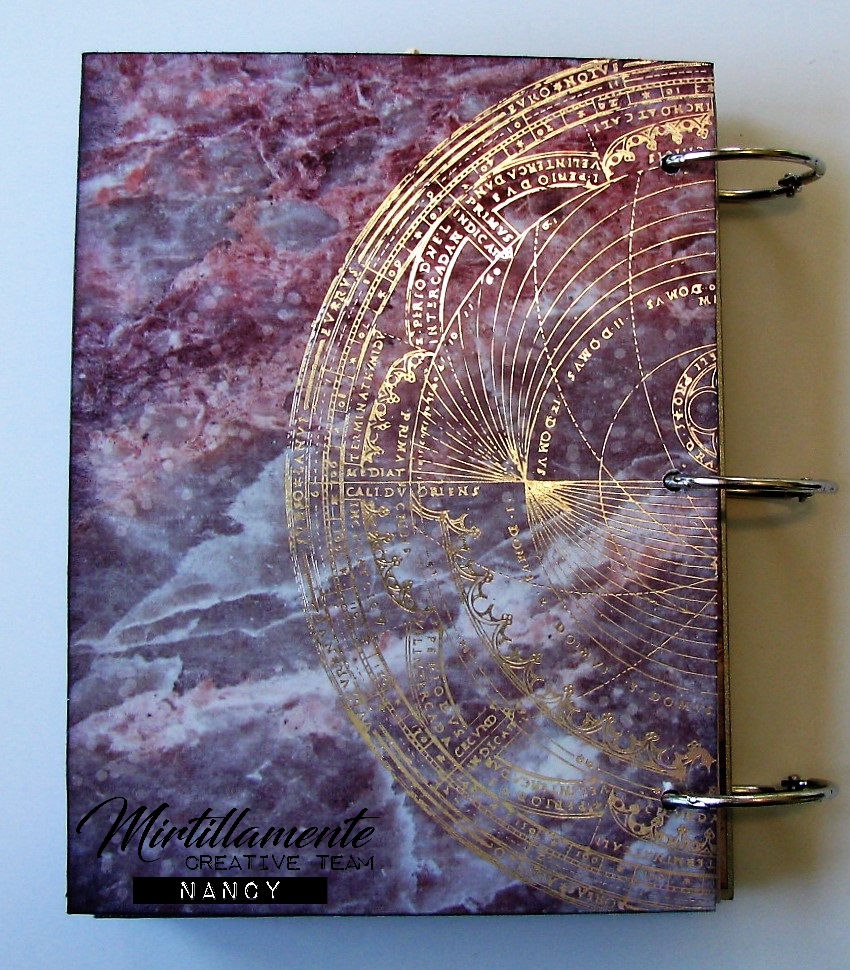

Above: The back cover.
Below: One final look at the front cover.
I added a number of the enamel accents.


I hope you enjoyed my mini album!
I really enjoyed creating it for you!

Head on over to the Shop and check out all the fun goodies!
I'll be back again soon!

Nancy  


venerdì 8 febbraio 2019

Project of the Month - Snow Card by Nancy Nickel - Creative Team

Hello, friends!

It's Nancy back with you today! I have another fun Winter project tutorial to share!
Spring is right around the corner, right? ;o) So we have to finish using all of our fun Winter products!
I still had lots of my fun Echo Park Stickers left. That is what inspired this card:


Here are the products I gathered for my project:
The Echo Park - I Love Winter 12 x 12 Sticker Sheet
White Cardstock Card Base - 4 1/4" x 9 1/4"
Piece of Heide Swapp - Magnolia Lane Paper - 4" x 9"


I began by adhering the decorative paper to the card front. It already looks frosty, doesn't it?


Then I looked at the Sticker Sheet and saw that many of the Stickers said "SNOW". I decided that would be the title of my card. So I began by using the letter stickers to add "SNOW" to the top of my card. I then added a question mark behind it. I also added a border sticker to underline it.

Next, I added the SNOWMAN sticker, with a snowman beneath it. I then added the Snowflakes sticker. To fill in the gap, I came back and added three pretty silver sequin snowflakes.


For the bottom half of the card, I added a Snowflake sticker, beside the Snow Day sticker.
Finally, I added the "Snow Much Fun" with the cute little penguin sticker!

I think Snow, Snowmen, Snowflakes, and Snowdays are just Snow Much Fun! I Love Winter! :o)


So for a finishing touch, I added the "I Love Winter" Banner Sticker to the top left corner of the card.


All together it's just a card full of Winter goodness!


There was one sticker left for the inside of the card:


 With that...I wish you all Warm Winter Wishes...before Spring arrives!


Thanks for stopping in for a visit! I'll see you again soon!  

Come visit me at The Nickel Nook! 


sabato 26 gennaio 2019

Project of the Month - Freezing Season Layout by Nancy Nickel - Creative Team

Hello, my friends!
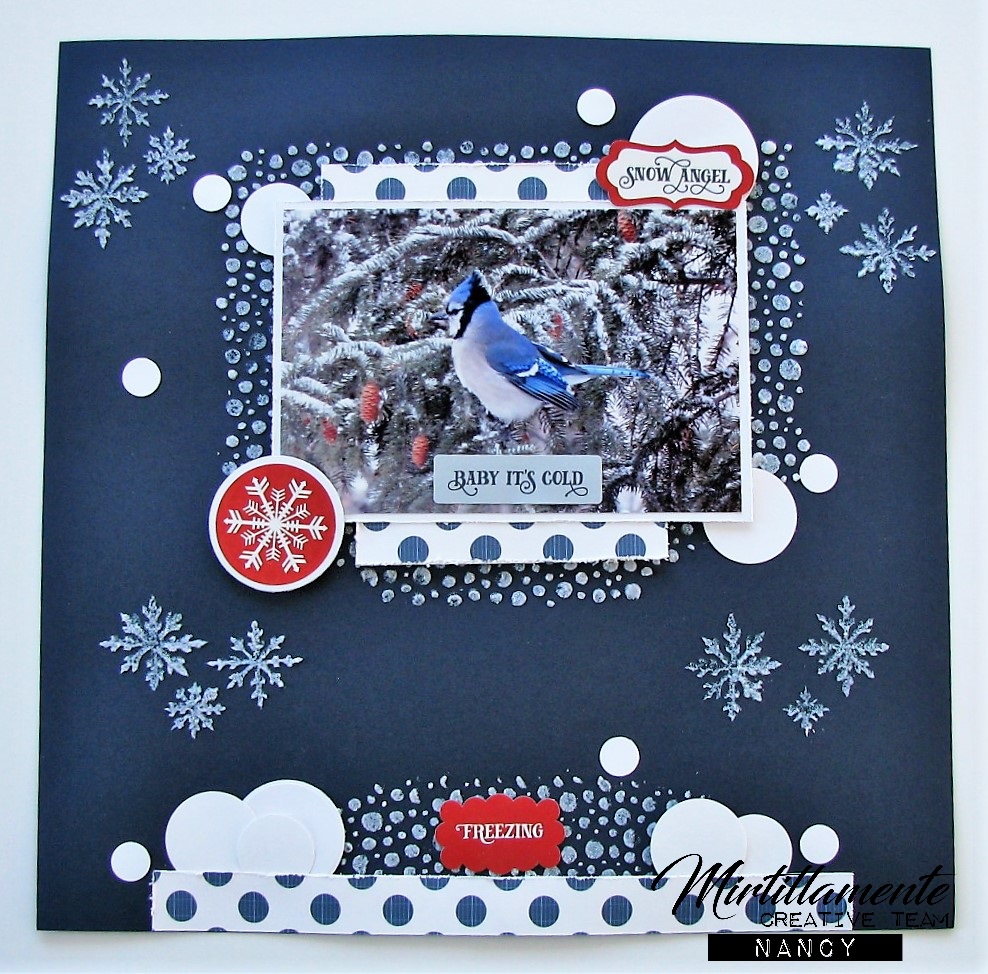
Today I have a Winter layout to share with you. I wanted to play with this photo of a beautiful Blue Jay that is a regular visitor to my back yard. He is VERY noisy, and always lets me know when he is there! I call this my Freezing Season Layout:


Here is how I created it:

I began by gathering a navy cardstock for my background base. I then used two Dylusions stencils (Let It Snow and Small Bubbles) and Prima art extra vagance Snowflake Paste.


I stenciled my snowy design, and then set it aside to dry. When it was dry, it resembled snow beautifully!


Next, I cut a mat for my photo from white cardstock, and I cut several strips from the Les Papiers de Padore - Weeeek-end! paper. I also punched several circles from white cardstock using my 1/2", 1", and 1 1/4" circle punches. These will be my snowballs.


This photo shows how I assembled all these pieces. I first distressed all the edges with a distressing tool. I began with matting the photo. Then I added a strip of paper to the top, and a smaller strip to the bottom. I then adhered it to the background using foam tape. I then added a longer strip of the paper along the bottom of the page. I then added a variety of the "snowballs" randomly around the page.


Finally, I added some fun stickers from the Echo Park - I Love Winter 12 x 12 Sticker Sheet. 


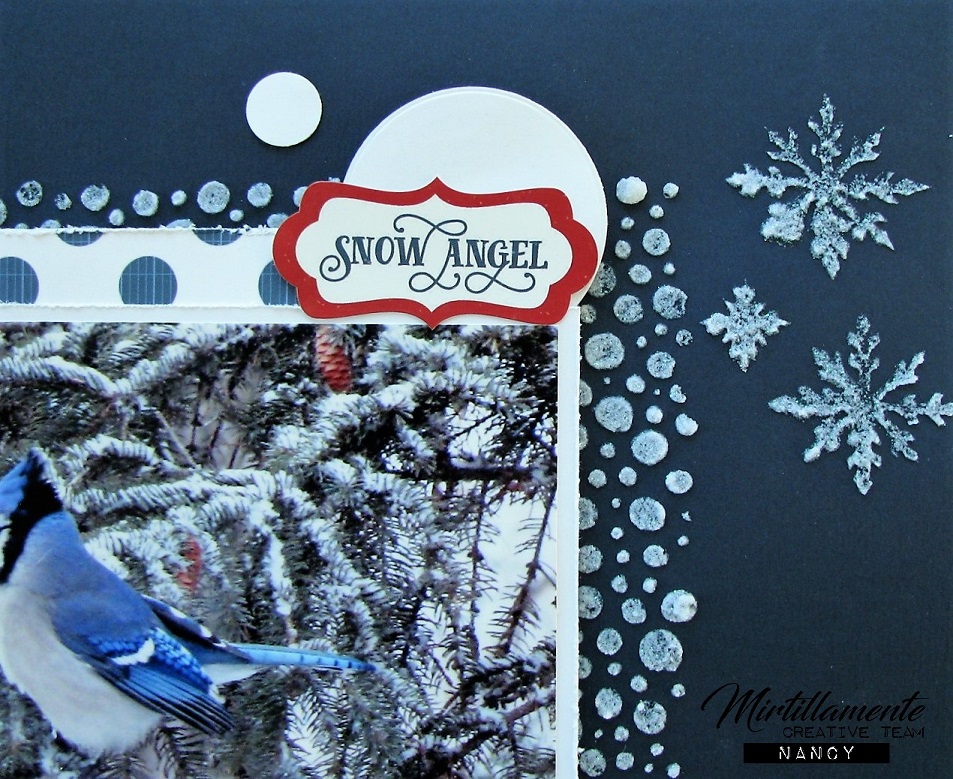
Here's a closer look at the photo, and the embellishments surrounding it:


Here's the bottom of the page:


The top right corner: 


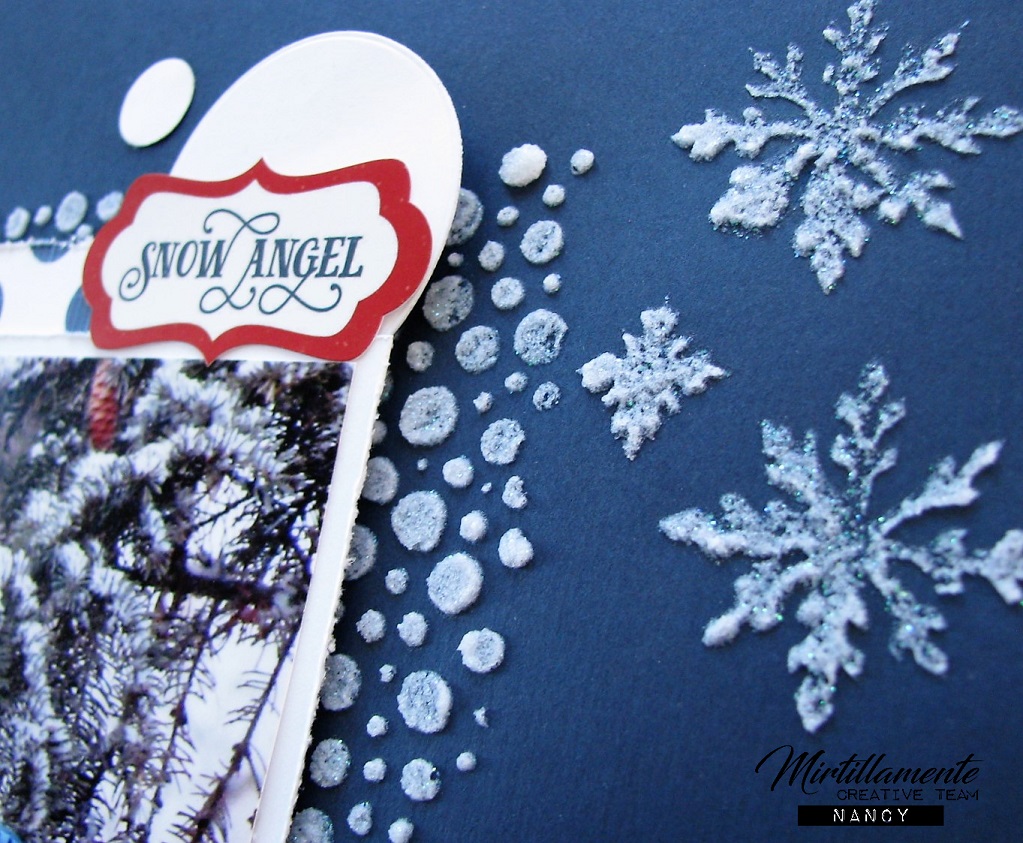
Here you can see some of the dimension the foam tape adds:


The paste also adds wonderful texture:


Here's one final look at the finished page:


Thanks so much for stopping by today! Enjoy happy Winter days!
Come visit my at The Nickel Nook


!

martedì 15 gennaio 2019

Progetto del mese: i nostri buoni propositi by Creative Team

Anno nuovo…. vita nuova?! Beh, tentiamo almeno di mettere giù qualche buon proposito per l'anno che inizia!!

E allora…. ecco qui le migliori interpretazioni dei buoni propositi creativi del nostro Design Team!

Siccome quest'anno mi sentivo ispirata, di buoni propostiti ne ho fatta una lista! E siccome spero tanto di tener fede a molti di loro e di vederne realizzato qualcuno, ho pensato di fargli prendere il volo fin da ora!


Un uccellino di cartone vegetale che ho rivestito con della pattern della collezione "Dear Diary" e a cui ho applicato alcune decorazioni delle stessa collezione. Al centro un piccolo taglio ospita lo spazio per i miei buoni propostiti per il prossimo anno!


… e che sia piano di creatività per tutti !!!!
Al prossimo post! Mara

* * * * *

Now it is Nancy here to share a project and to wish you all the Very Best for 2019!
I have created a very CAS card - Clean and Simple. This is the best way to begin a new year!


I began with a white card base in A2 size. Then I added this lovely paper from Authentique - Lovestruck. The round sticker label is a Cozy Christmas Sticker from My Mind's Eye. Over that I added the Teresa Collins - Hello My Name Is sentiment, using foam tape. Finally, I added some crystals from the Prima Amber Moon Collection. 


Here is a closer look at the focal sticker with the sentiment:


This is my wish for you...that you may live every day of the New Year with Gratitude! 
Happy New Year! 

* * * * *

Segui le tue Passioni by il Cieco Fuffo


Il mio bun proposito per questo nuovo anno? Fare le cose che mi piace come mi piace.  Non amo i buonismi stereotipati che aleggiano sempre dall'inizio di Natale fino a dopo capodanno, non mi riprometto solo in questo periodo di essere brava, compassionevole ed onesta, si certo l'inizio di un nuovo anno è sempre un momento buono per rideterminarsi, ma quest'anno ho deciso di seguire mie passioni e non farmi limitare se come al solito  andrò fuori dalle righe della massa...sono così: colorata, incasinata e disordinata, e la mia tag lo dice chiaro.


In questo lavoro ho racchiuso molto di quello che mi piace, la carta vintage con una forma geometrica che adoro -Autentique "LOVESTRUCK"- gli ingranaggi Steampunk che stamperei anche sulle saponette-Tim HOLTZ "GEARS" mini stencil THMSO52 -elementi in legno -Yuppla "cornici vintage"- e metallo che adoro di più , ed al centro un cuore in paperclay da un molde di la Stamperia- che rappresenta ME.


Ho usato alcuni dei colori che amo di più: Nero ovviamente, Rosa Fuxia, Verde acido e Rose gold, sparpagliati con materiali dagli acrilici ai Nuvo drops, e un tocco cyber con gli enamel dots Giallo Fluo della  Dovecrats.
Arrivata alla fine porgo a tutti i miei auguri di buon inizio 2019 e mi raccomando fate ciò che Amate, non solo quello che Dovete e soprattutto siate voi stessi.

Diana del Cieco Fuffo

***

Che il mio limite sia il cielo  
by Katrin Poe Mg 


I miei buoni propostiti per il nuovo anno, per poterli realizzare dovrò necessariamente liberarmi di tutto ciò che per me è tossico e nocivo, come le vibrazioni negative, che ci arrivano da ogni dove, per poter crescere sia come persona che come artista, è un processo lungo e difficile, poichè gli impulsi negativi ci arrivano da ogni dove, e l'unico modo per allontanarsi quanto più possibile da loro e guardare verso il cielo e magari cercare di raggiungere una distanza tale che la negativita che ci affligge non ci possa raggiungere, il trucco sta ne farsi scivolare addosso tutto ciò che non serve e liberarsi dei pesi morti, solo così potrò raggiungere quelli che sono i miei buoni propositi per il nuovo anno, mai fermasi troppo a lungo su un'idea se questa non va, vuol dire che era un imput sbagliato, le persone che brillano di luce propria possono essere di ispirazione per gli altri, ed è uno dei miei obiettivi diffondere vibrazioni positive, e sognare in grande perchè innanzitutto è gratis, inoltre tutto ciò che abbiamo in programma è il nostro progetto a cui lavorare e ogni progetto, purchè piccolo per tutte noi rappresenta comunque una sfida,  e quindi sognerò in grande e vediamo dove vado a parare.


 Ho tutto riversato in questo art journal, realizzato con gli inchiostri spray della Lindy's stamp gang, qualche avanzo di carta di collezzioni passate e la carta  Aurora della Craft Smith, ho smplicemente lavorato per strati alternando i colori prima chiari e poi scuri.


 La prima parte è stata realizzata appunto alternando chiaro e scuro, e ho incrementato i colori utilizzando i Dylusion ink per enfatizzare ancora di più il rosa e il viola, a cui è stato aggiunto del blu, mentre l'esterno è stato realizzato con dei normali colori acrilici come il verde acqua, il rosa tenue, e il blu notte, prima di passare alle decorazioni di carta, ho fatto asciugare tutto perfettamente.


Per la parte finale ho ritagliato la carta color legno per realizzare il tronco, stessa cose per le piccole gemme che vedete, ho terminato con alcuni sentiments sempre prese dalla collezione Aurora della Craft Smith, e dato un tocco di luce con del semplice colore bianco acrilico.
Spero possa esservi di ispirazione.


Qualunque sia il vostro proposito per il nuovo anno ricordate solo che non deve essere una cosa scelta e decisa solo perchè va di moda, o perchè lo avete letto su facebook, è una cosa che se decidete di farla è solo per voi, e per nessun altro.


Katrin Poe Mg