mercoledì 17 ottobre 2018

Progetto del Mese: Pop Up Shaker Card and Tag Halloween by Angie Scrapchild - Creative Team

Hola Mirtilli!!
Hello Mirtilli!!

Ha llegado el otoño, y con él, la primera fiesta divertida de la estación: Halloween!!!.
The autumn has come, and with it, the first fun Festival of the Season: Halloween!!!.

Os voy a mostrar una tajeta pop up con shaker y un terrorífico tag!
I'll show you a card pop up with shaker and a terrifying tag!

Éstos son los materiales que vamos a utilizar. Podéis encontrarlos en Mirtillamente Craft Shop:
These are the materials we are going to use. You can find them at Mirtillamente Craft Shop:
Lápiz, regla, tijeras, cinta doble cara 3D, pistola de silicona, pegamento, tinta y almohadilla, cizalla.
Pencil, ruler, scissors, 3d double-sided tape, silicone gun, glue, ink and pad, shear.
 Cartulinas naranja, verde, morada y negra./ Cardboards orange, green, Purple and Black:
Sello Joy Crafts Bruja/  Stamp Joy Crafts Witch
Bolsas/Bags : Masquerade
Kit Paper Authentique Nightfall
Cinta tricolor/ Tri-color tape:  Twine
Shaker ornaments halloween
 Espero que os guste!! I hope you like it!


Y ahora vamos con el paso a paso:
 And now we go with the step by step:
Recortamos 3 cartulinas:
La negra de 30,5cms x 11cms y la doblamos por la mitad.
La naranja de 27cmsx10cms y la doblamos en abanico en 4 partes iguales.
La verde de 21cmsx10cms y la doblamos como en la foto (marcando las diagonales a 5,5cms de los extremos).
We cut 3 cardboards:
The black 30, 5cms x 11cms and fold it in Half.
The orange of 27cmsx10cms and we fold it in fan in 4 equal parts.
The green of 21cmsx10cms and fold as in the photo (marking the diagonals to 5, 5cms of the ends).
Doblamos como en el dibujo e igualamos la parte inferior./Fold as in the drawing and match the bottom.
Pegamos por  la punta en el centro de la cartulina negra por ambos lados.
 We stick by the tip in the middle of the black cardboard on both sides.
Pegamos la cartulina naranja como en la foto, en ambos extremos.
We paste the orange cardboard as in the photo, at both ends.


 Doblamos la estructura para comprobar que nos queda bien:
 We bend the structure to check that it looks good:
Comenzamos la decoración interior y exterior a nuestro gusto.
We started the interior and exterior decoration to our liking.


Hasta aquí la pop card shaker, ahora vamos con el tag!!
So far the pop card shaker, now we go with the tag!


Embosamos con la carpeta la cartulina y entintamos el relieve para darle profundidad.
 Embossing with the cardboard folder and inking the relief to give it depth.


Recortamos un tag más pequeño con las manos.Lo arrugamos, lo grapamos, y lo remarcamos.
We cut a smaller tag with our hands. We wrinkled it, stapled it, and remarked it.


Lo adornamos a nuestro gusto. We adorn it to our liking.


Utilizamos una preciosa bolsita para guardar nuestro tag. 
We use a precious bag to store our tag.


mercoledì 10 ottobre 2018

Progetto del mese: Back to school... delle pesti! Lo by Creazioni di Mara - Creative Team

Ciao a tutti!
Con un piccolo ritardo sul reale inizio delle scuole… pubblico il LO realizzato con le foto scattate proprio il primo giorno di scuola delle mie due piccole pesti!

E' un Layout semplice e scherzoso, che lascia ancora spazio alla fantasia e al gioco tipici dell'asilo e non ancora della scuola "vera", visto che per ora ci godiamo ancora la spensieratezza del nido e della scuola dell'infanzia.


Materiale utilizzato:
- foglio di base pattern 12"x12" di una vecchia collezione di Heidi Swapp (di cui non ricordo il titolo)
- vellum
- Ritagli di vecchi Bazzill in tono (… mai buttare i ritagli, ne le vecchie fustellate!)
- Cartoncino bianco lucido
- Tag "calendario"
- Big Shot
- Fustelle tonde con impuntura
- Fustelle polaroid MyFavoriteThings
- Fustella "instants" Kesi'art
- Biadesivo vari spessori

L'assemblaggio è piuttosto semplice, ho applicato delle strisce di vellum, semplicemente strappato a mano, sul lato destro del foglio. Ho avuto cura di farne di larghezze diverse per dare movimento; inoltre la sovrapposizione del vellum "stacca" le foto dal fondo pattern e le mette in risalto.
L'ho poi fissato nella sola parte alta del foglio con del biadesivo, successivamente mascherato dal tondo di Bazzil (perché il biadesivo si vede SEMPRE sotto il vellum!), nella parte bassa il vellum non è fissato, anche se dalla foto si apprezza poco.

Ho stampato la stessa foto delle mie bambine, in tre formati differenti. 
Ho fustellato le polaroid su un ritaglio di cartoncino bianco lucido, che ricorda la carta delle polaroid originali, e tagliato l'eccesso delle foto.
Ho fissato le foto cambiando le orientazioni per dare un po' di movimento; aggiunto a margine il calendarietto di settembre e aggiunto piccoli ritaglia tondi e la macchina fotografica a riempire. Per ultimo ho fustellato la scritta "instant" e applicata sopra a tutto.

Vi lascio qualche dettaglio ingrandito.


Spero che il mio Layout vi sia piaciuto e possa esservi di ispirazione!

Mara

venerdì 21 settembre 2018

Project of the Month: Therapy for the Soul Tag by Nancy Nickel - Creative Team

Hello, everyone! It's Nancy here with a fun new project share!

With the Summer season coming to a quick end here in Canada, I was inspired to use my Suzi stamp from Julie Nutting to create this pretty tag.

The papers I used were from the Prima Havana Collection. They were all left over from the fabulous June Monthly Kit.

Here is my finished tag:


Here is how I created it...

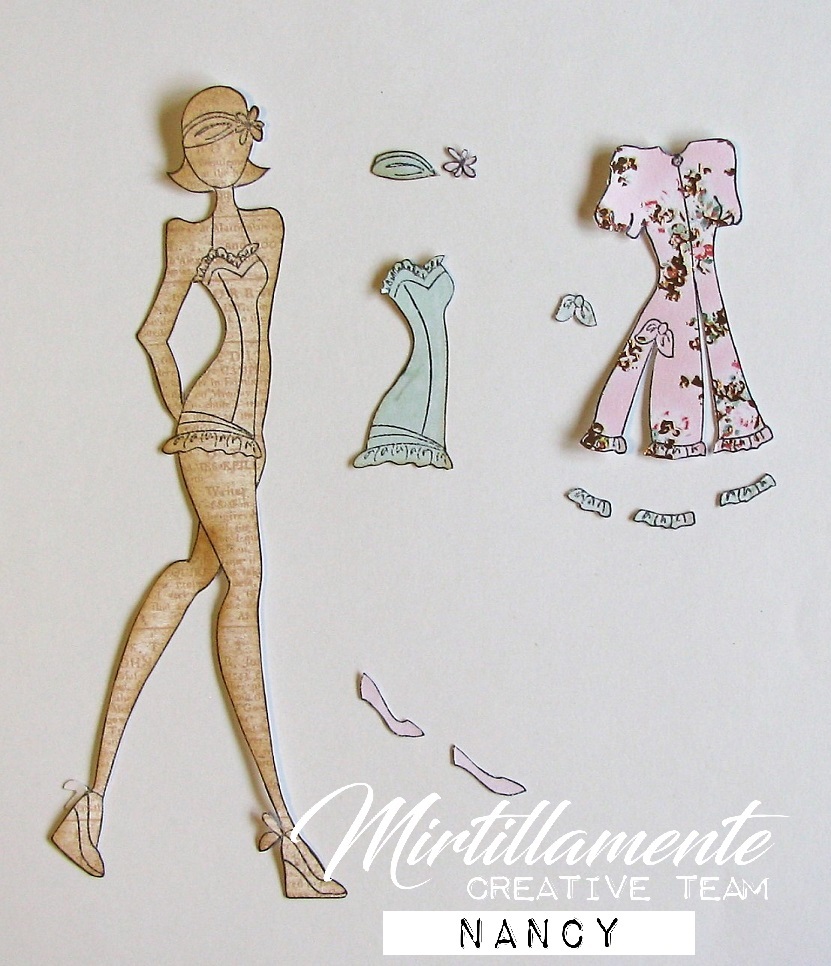
I began by stamping the image on a piece of Julie Nutting paper that I had in my stash. Then I stamped it on various pieces of the Havana papers, as shown in the photo below. Then I fussy cut all the pieces, and inked them with Vintage Photo Distress Ink.


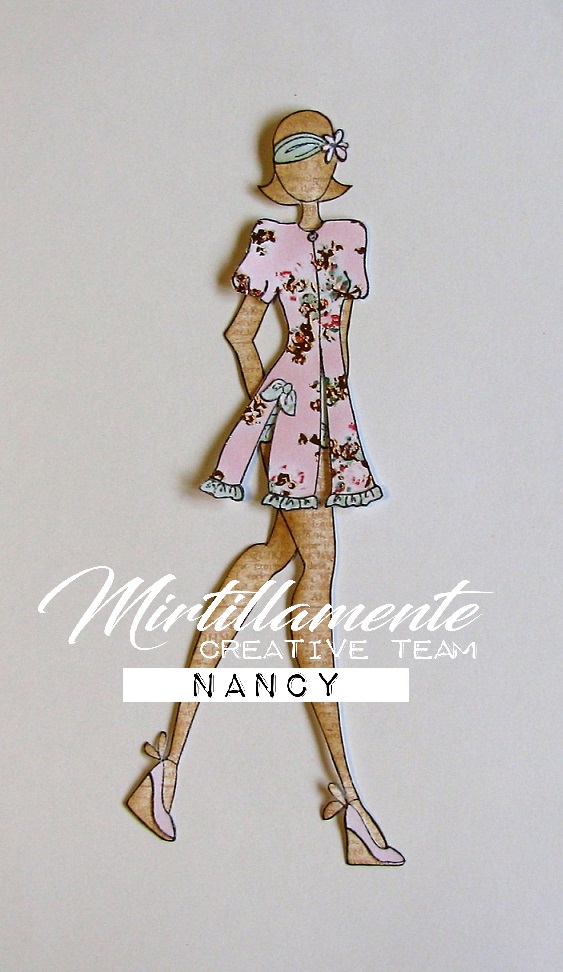
Using a glue pen, I adhered all the clothing pieces to the doll.


To create the tag base, I began with a piece of 4 1/4" x 8 1/4" Kraft Cardstock. I angle cut the corners. I cut a strip of the pink wood grain paper for the bottom of the tag, to represent the boardwalk. Then I cut a piece of my favorite paper to cover the rest of the tag. All the edges were ink distressed with the Vintage Photo ink. 


I punched a hole in the top center, and inserted an extra-large eyelet. Through the eyelet I inserted a double loop of pale green seam binding from my stash. I adhered the doll to the tag using foam tape.


I stamped out the sentiment, included with the stamp set, and matted it with the pink woodgrain paper. I added the pretty green bow from the Ephemera pack. I adhered it to the tag with foam tape.


Finally, I added Diamond Stickles to the bows, the shoes, the headband and flower, and the ruffles.
Here's a closer look at the sparkly shoes:


Here you can see the lovely dimension and sparkle of the tag:


Here's one final look at the finished tag:


Thanks so much for stopping by today! Come visit me at The Nickel Nook! :o)

Here are the links to all the products in the shop:


venerdì 31 agosto 2018

Progetto del Mese: ATC with surprise!! by Angie Scrapchild - Creative Team

Hola Mirtilli!!
Hello Mirtilli!!

Estamos en Agosto y muchos tenemos vacaciones. Visitamos lugares nuevos y conocemos nuevos paisajes.
Os invito a descubrir la sorpresa de mi veraniego tag.
We are in August and many have vacations. We visit new places and we know new landscapes.
I invite you to discover the surprise of my summer tag.


 En la maravillosa Mirtillamente Craft Shop podéis encontrar todos los materiales utilizados. Además está de rebajas!!
  In the wonderful Mirtillamente Craft Shop you can find all the materials used. Also has sales!"
Mirtillamente Craft shop

 He utilizado:
I have used:
 Sizzix Thinlits Phrases Thank you Flamingo 
 Memento Ink pad Grape Jelly 
My Big Wheels
Acetato 

 Espero que os guste!!
 I hope you like it!


Os muestro el paso a paso. Me gustaría ver vuestras interpretaciones!!
I'll show you the step by step. I would like to see your interpretations!

 Materiales:
 Materials:

Marcamos en el papel decorado y en el acetato  las medidas de un ATC:  2 1/2” x 3 1/2”. Y los recortamos.
 We mark in the decorated paper and in the acetate the measurements of an ATC: 2 1/2 "x 3 1/2". And cut them.


Con un washi tape o papel decorado pegamos ambos: borde con borde. Por delante y por detrás.
With a washi tape or decorated paper paste both: Edge with Edge. Front and back.


Y lo plegamos por la mitad para que quede como un libro.
And we fold it in half so it stays like a book.


 Recortamos unos diecuts del papel decorado, troquelamos o utilizamos los que tengamos de adorno.
We cut some diecuts of the paper decorated,  or use the ones we have of adornment.


Los pegamos con la pistola de silicona caliente en la portada de acetato. Y también el interior con cinta de doble cara foam 3d
 We stick them with the hot silicone gun on the cover of acetate.
And also the inside with double-sided foam 3d tape


Entintamos el sello que vamos a utilizar.
We ink the seal we're going to use.


Y ya lo tenemos listo!!
And we have it ready!


Seguidnos en Facebook:
Follow us on Facebook: